SoftMouse.NET / RAPID Lab

Your data can tell a story about your colony, but it needs to be integrated into a single
standardized system for meaningful information to be drawn. SoftMouse.NET is continually working
to streamline your workflow by offering valuable integrations.
We’re excited to announce that SoftMouse has integrated with RapID Lab's RapID Tags® to
automatically match the ID colours with our cage-card and mouse labels.
RapID Tags are humane, automated, and cost effective mini-ear tags that provide fast and
accurate identification for lab animals. The 2-D barcode scans instantly while providing millions
of unique IDs while the multiple colors allow for immediate secondary visual identification.
RapID Tags are minimally invasive and are even MRI and autoclave compatible.
Using RapID tags in SoftMouse offers the following benefits:
- Scanning physical tags offer improved accuracy when inputing and retrieving data.
- Uniquely coloured identifiers for visual identification without disturbing caged animals.
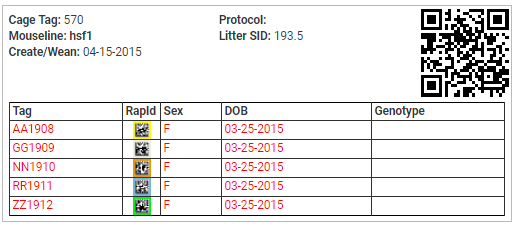
- Automatically matched mouse tag with cage card tag
To get started, simply change the physical ID field to the scanned value of the RapID tag. It’s
that easy. If you require more in depth education, Please Click here and contact the SoftMouse Team.
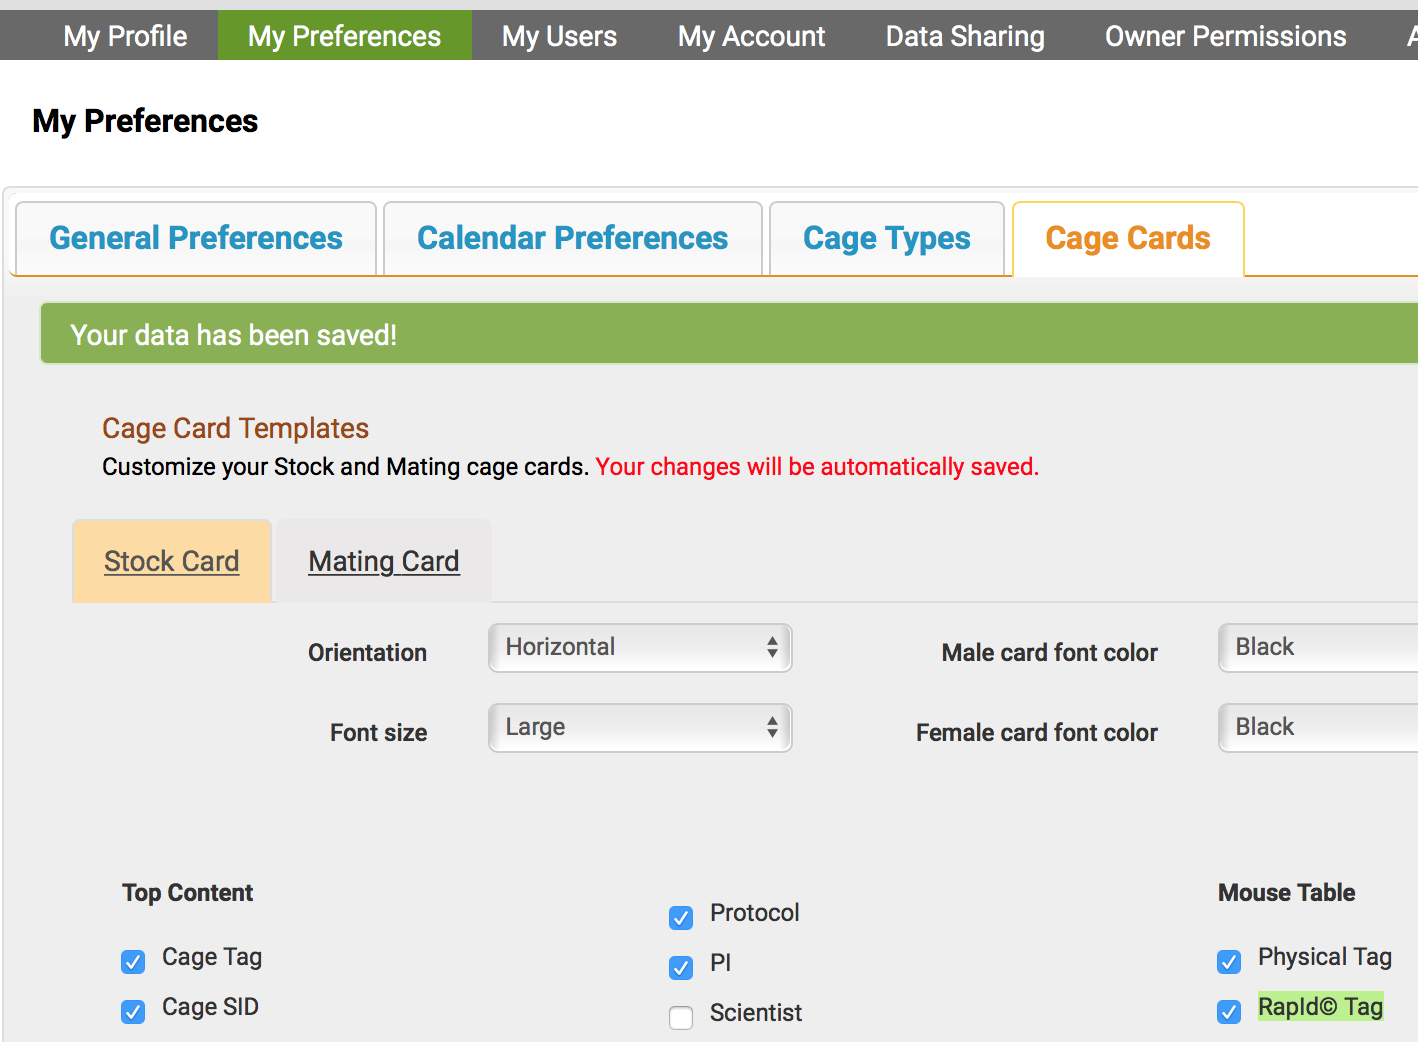
How to enable RapId© Tag Functionality
In Softmouse, you have many convenient options to identify your mice within the system. One of those options is enabling the function to use RapId© Tags as a form of identification for your mice. Once enabled, you can conveniently scan to enroll RapId© Tags that have been applied to your mice as well as being able to scan to identify each mouse and be forwarded to their corresponding Mouse Record to add or edit any information.
To enable the RapId© Tag Functionality:
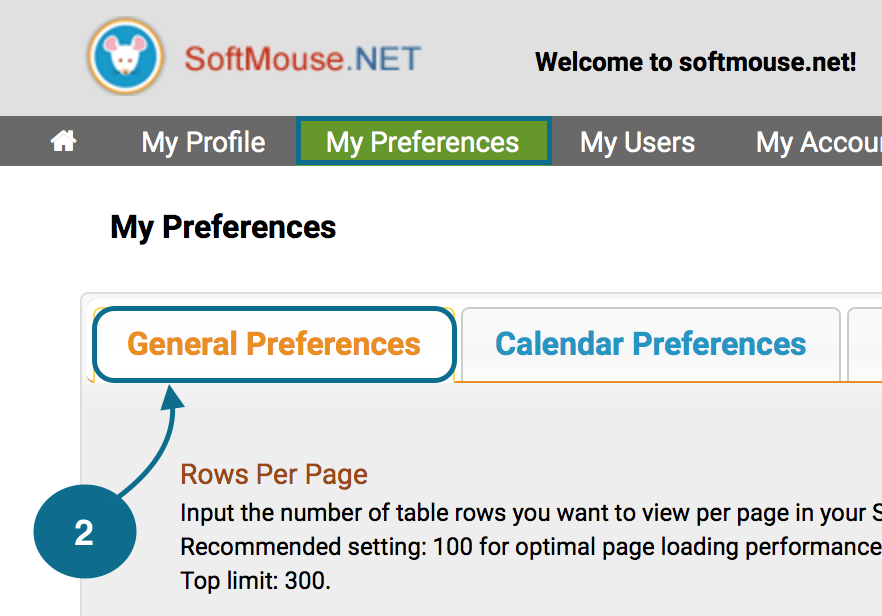
1. First, log in as the admin user on your account and head straight to the home menu.
2. Next, click on the My Preferences tab and make sure you are on General Preferences page.
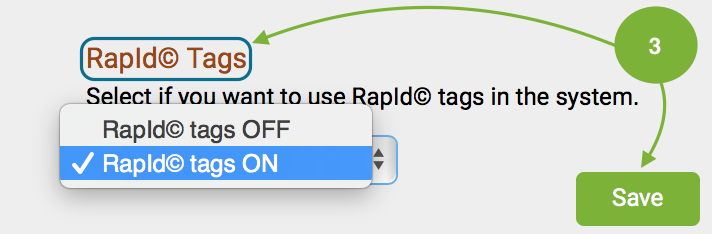
3. Scroll down to the last option for RapId© Tags, select "On" from the drop down list, and click on the green "Save" button on the lower right hand coner of your screen button to save your changes.
4. Finally, before you begin scanning any RapId© Tags, scan the attached two codes with your RapID scanner in order --- This will ensure that after every scan the scanner will simulate a "tab" which will allow you to continuously scan mice when enrolling them into SoftMouse without needing to use your mouse / keyboard to go to the next mouse after scan.


How to Scan Mice with RapId© Tags
Wether you just purchased new mice, are editing existing mice in your database, or are adding a new litter and are using / applying RapId© Tags, you can enter their tag information easily into the system with a simple scan.
Once enrolled, you can conveniently scan each mouse RapId© Tag directly from the mouse and be forwarded to their corresponding Mouse Record to identify, add, or edit any information.
Select a method below to learn more:
If you haven't yet enabled RapId© Tag functionality, please click here.
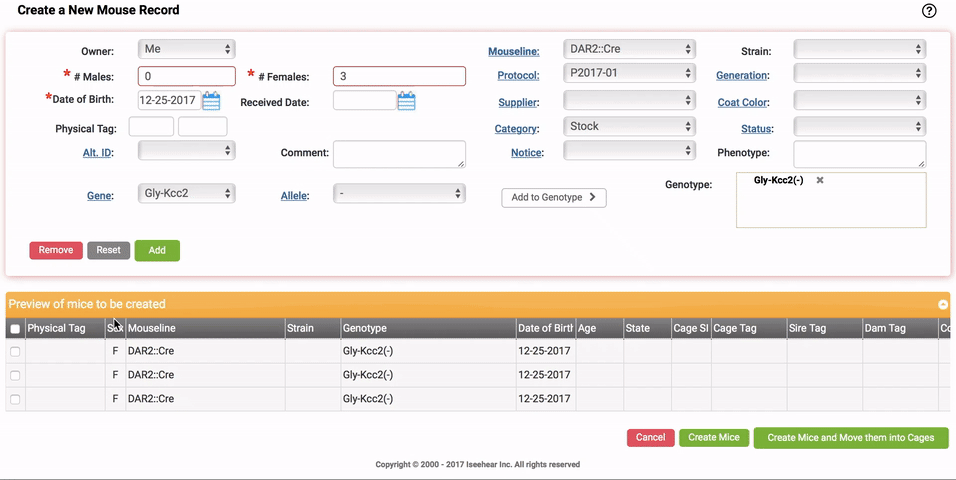
To Scan New Mice with RapId© Tags:
1. Go to your Mouse List and click on the New Mice button.
2. Enter in the number males / females you want to add, fill in the rest of the form and click on the green "Add" button.
3. Next, select all the mice your entering and put your cursor in the first Physical Tag cell.
4. Now just scan away. After each scan, you'll be taken immediately to the next cell so you can scan the next mouse. --- Continue until all mice are scanned
5. Finally, complete your additions by clicking the "Create Mice and Move into Cages" button
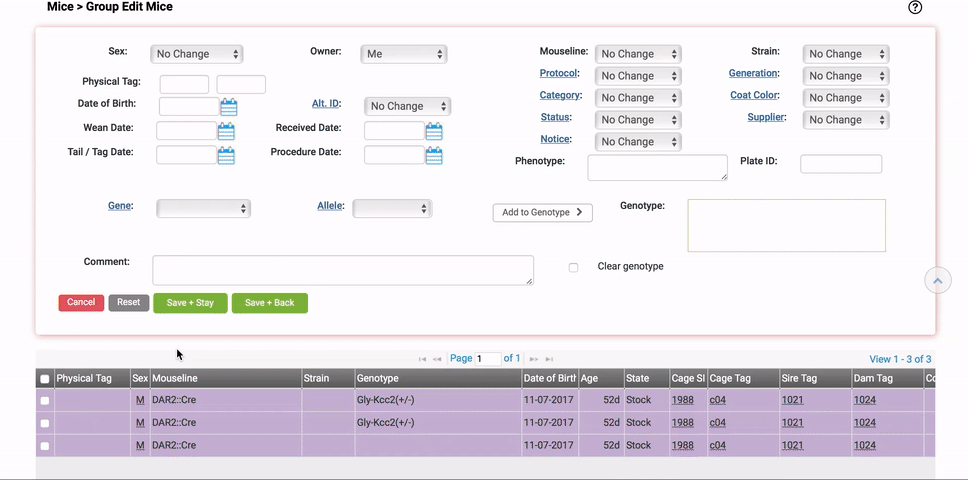
To Scan existing mice with RapId© Tags:
1. Go to your Mouse List, select all mice in question, and click on the Edit Mice Tab.
3. Now just scan away. After each scan, you'll be taken immediately to the next cell so you can scan the next mouse. --- Continue until all mice are scanned
4. When done, click on the green "Save+Stay" button to save your changes.
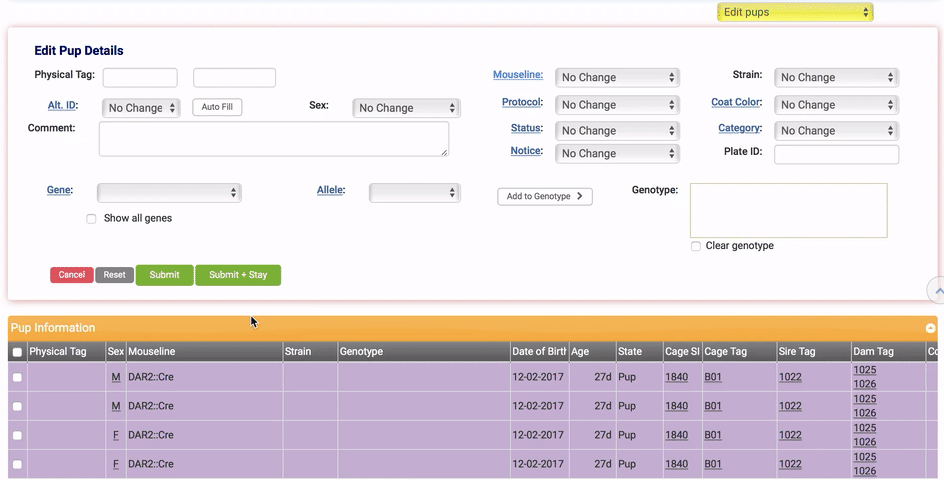
To Scan New Pups with RapId© Tags:
1. Go to your Litter List, select the Litter in question, and click Edit Litter.
2. On the Edit Litter Record page, select "Edit Pups" from the yellow drop down at the top right
3. Select all pups in the Pup Information table, put your cursor in the first Physical Tag cell
4. Now just scan away. After each scan, you'll be taken immediately to the next cell so you can scan the next mouse. --- Continue until all pups are scanned
5. Finally, complete your additions by clicking the "Submit" button
TIPS
- Tip 1: If you already entered mice and scanned them but do not see the colored square on your Mouse List, you need to:
1. Select all mice from your Mouse List and click Edit Mice
2. On the Group Edit Mouse page, select all mice again and click Save+Back
You should see the squares now. The reason they weren't showing before is the tags were scanned in prior to the RapID Tags setting being enabled on your preferences - so they weren't recognized as being RapID Tags. Going forward, the squared will show immediately after scanning and saving.